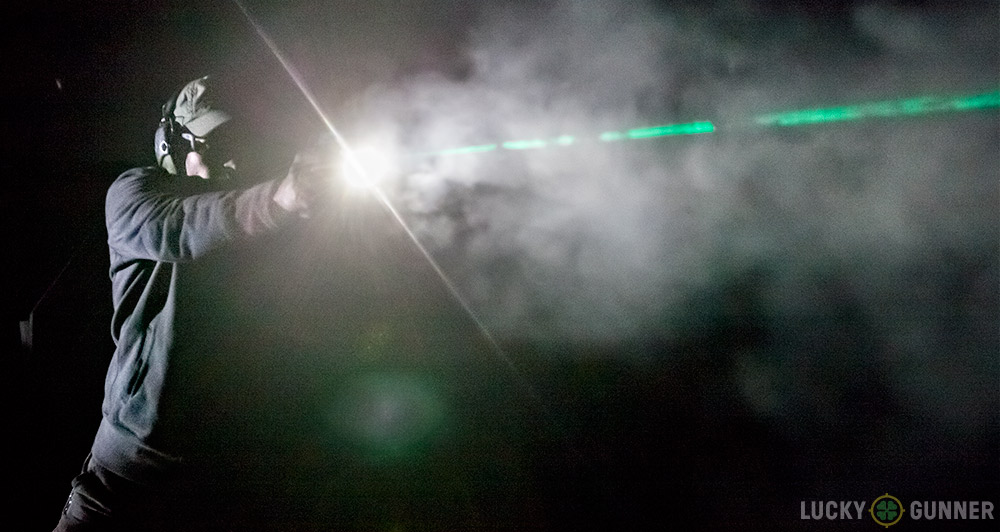
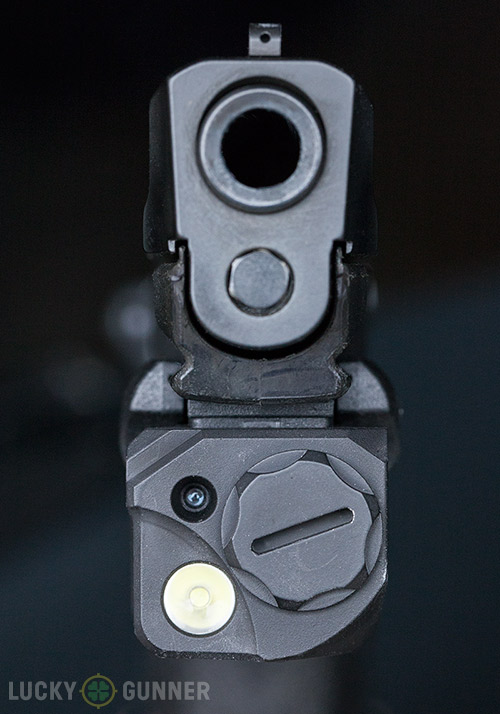
◇2-in-1 compact LED flashlight and green dot laser sight combo for sub-compact combination,provide civilians and armed professionals a robust 1x aiming solution ,for any situation 20mm width Rail Picatinny base.
◇Point-of-aim is point-of-impact and the green dot remains parallel to the bore of your firearm, no matter what your viewing angle is relative to the optical axis of the sight.
◇The green laser will be brighter than any red laser during the day for visibility in all light conditions,This Green Laser have three-position mode selector switches from flashlight to laser to combination.The methods is Laser only or flashlight only or both together.
◇Turn on the ON / OFF switch at any time to save power and prolong the use of time,Steady on/Strobe modes with runtime of 50 minute,220 Lumens is completely adjustable for windage and elevation to ensure precise targeting with every shot.
◇Green laser sight is extremely low profile, yet powerful, designed to fit any rail-equipped pistols including Modem Semi-automatic Pistols,MSR rifles, shotguns, carbines,handguns, rifles,shotguns submachine guns, and full-sized handguns. The green laser sight fits onto weapon with 20mm Picatinny-Weaver Accessory Rail Mount.
Product description
2HY01 High Performance tactical Laser sight and flashlight combo is designed and built for standard and sub-compact pistols with integrated railing system.the laser is a Class IIIA visible green laser with windage and elevation adjustment with 180 lumen light.the green laser has excellent low temperature working performance.rail grip clamp system securely attaches/detaches quickly and safely with no tools,use just the laser,just the light or both. Features: ◇Laser class: IIIa ◇Power Output: <5mW ◇Ambidextrous On/Off Switch ◇Light:Up to 200Lumens/Laser Wavelength:532nm ◇Windage and Elevation Adjustable ◇Fast,safe,adjustable and secure mounting to picatinny rail ◇Weight:47.9g with Batteries ◇Dimensions L×W×H,2"×1.375"×1.813" ◇3 Modes(Laser,Light,Laser/Light)(“light only”can be solid beam or strobe)
Battery Installation: 1.Turn the battery cover counter-clockwise until cover be removes.
2.Remove depleted batteries,if any.
3.Insert new batteries with the correct polarity as shown.
4.Replace battery cover by screwing the cover back in clockwise.
Laser Sight Adjustable: ○Windage:Use small flat-head screwdriver to turn side screw clockwise and counter-clockwise to adjust. ○Elevation:Use small flat-head screwdriver to turn bottom screw clockwise and counter-clockwise to adjust.
Switch Operation: There are two switches located on both sides of the device.
Both can operate the On/Off switch of the laser.
Package Included: 1* Green Gun Sight Laser Flashlight Combo 1* Allen Wrench 1* 3V CR23A Lithium Battery
Features:
High quality CREE XM-L2 LED with 350 lumen output strobe powered by 2x CR2 battery (included) Fits Glock 17, 19 or similar sizes of pistols. It requires 1.5" clear space in front of trigger guard
< 5 mW, Class IIIA Green Laser Sight meets US law requirements (5mW peak, 532nm, Class 3R)
Push button switch allows the user to instantly activate or deactivate the laser
Clamp mounting system fits all Weaver and Pictinery rail
Green Laser Sight Specifications
Beam intensity/wavelength: 5 mW peak, 532 nm, Class III R
Laser beam divergence: 1.2 mrad
Spot size: Approximately 0.1 inches in diameter at 50 feet
Range: Up to 100 yards in daylight, up to 2 miles at night
User-adjustable: Yes, full windage and elevation
Construction: Aircraft grade aluminum
Battery life: 2~3 plus hours laser (constant)
Installation: Loosen the screw, slides onto tactical rail, then tighten the screw
Ambidextrous activation/deactivation
Included accessories: an Allen wrench, user's manual
Laser Sight Adjustable:
○Windage:Use small flat-head screwdriver to turn side screw clockwise and counter-clockwise to adjust.
○Elevation:Use small flat-head screwdriver to turn bottom screw clockwise and counter-clockwise to adjust.
Switch Operation:
Function selection toggle switch for laser/light/strobe flashlight/laser+light option.
Button On/Off switch of the laser.
Remote switch for rifle shooting aim.
Installation process
Well, you will have to install the sight on your gun if you have to use it at some point. This comes down to the ease of installation. Sometimes you get a shooter hating a model simply because of the installation process. That changes today when it comes to using the various models.
Check out what it takes to install it on your gun before buying it. You can also look at the manual to see what the installation is all about. Only pick a model that will be easy to set up.
Value for money
As much as the price is not the best way to evaluate a product, many people still use it. So, it is worth noting how it affects the product. You always want to pick a model that offers value for money. Even if you are going to pay more for a product, it should be worth every penny that you are spending.
Another thing worth noting is that not all the cheap models will be worse in performance. They can be affordable and still get the job done. Always compare the price to the features you get at that price. Durability
For a product that is going to be used mostly on the pistols and rifles with recoils, it has to be durable. Many manufacturers will do anything possible to make sure that the laser sight they release to the market is highly durable. You do not want to have customers who are unsatisfied about quality.
It is possible to find most of the sights being made of an aluminum exterior. The aluminum material is strong on overall and still lightweight. You can see it is possible to deal with two important features with just one material.
Features and specifications
From the various reviews above, it is possible to see that each of the model will come with different features to offer. It is from these features that you can learn more about the capability of the sight. Some of the things you have to check includes the brightness level. Of course you want to end up with a bright sight for enhanced visibility.
You also have to check the range at which the laser remains visible. It is understandable that you will have low range during the day and more during the night.
Look at the other features to make sure that the sight will add value to the performance of your gun.
Conclusion
Working with laser sights is fun only when you have picked the right now. Of course that should be easy thanks to the reviews and buying guide above. You can be sure to find many people considering to pick the laser sight now after learning more about what it can do.
All the laser sights mentioned above are going to help you with having an easy time using it. There is no doubt you will end up with a top product whichever you decide to pick.
why shooters are choosing green beams laser sight?
Green lasers offer greater visibility over traditional sights in low light shooting
Shooters are turning more and more to laser devices to augment traditional sights, giving an increased tactical advantage when shooting defensive handgun or tactical rifles.
Available in red or green, these lasers allow gun owners to effectively shoot from unorthodox positions, such as lying on one side or shooting from behind cover. They also boast the additional benefit of being easily seen in low light and no light shooting situations, a pro that traditional sights lack.
Green lasers are nothing new to the industry, introduced to the commercial market several years ago, but they’ve continued to gain in popularity and now many laser accessory companies tout models in both red and green. What makes green the trendier option and why are consumers willing to throw down more cash to own one?
Before delving into the pros and cons of green beams, it’s important to understand how laser technology even works.
Laser, short for Light Amplification by Stimulated Emission of Radiation, describes a concentrated beam of light. This concentrated light beam results from optical amplification of a specific wavelength of light. Our eyes detect a narrow spectrum of light, which is aptly named the visible light spectrum. The invisible light spectrum consists of high-frequency infrared, gamma rays, X-rays and ultraviolet rays. Commercial lasers fall into the visible light spectrum.
Regulated by the Food & Drug Administration, laser makers are restricted to producing visible lasers with an output of no more than 5 milliwatts. These lasers are classified as Class IIIA and are deemed “eye safe” — meaning, if a person stares at one, the brain will trigger the blink reflex before any damage to the retina can occur.
How does this effect red and green?
Though both color options are restricted to the same 5mW output, green appears brighter due to the make-up of the human eye. The eyes’ photoreceptors, the rods and cones located in the retinas, are more sensitive to light in the green wavelength of 520 to 570 nanometers; therefore humans perceive green as brighter because the photoreceptors are easily stimulated by this wavelength.
The chart above shows green landing in the center of the Relative Sensitivity/ Wavelength (nm) spectrum. (Photo: Crimson Trace)
The chart above shows green landing in the center of the relative sensitivity/ wavelength spectrum. (Photo: Crimson Trace)
“Side-by-side, a green and red laser will result in a green laser that is easier to see during bright conditions,” LaserLyte’s Dusty Gibson told NRA Family. “During low light conditions both are extremely effective.”
Green lasers boast brighter results, however they are extremely temperamental. Unlike red lasers, the only way to generate a green laser beam is through a complicated process that requires converting a high power IR beam to visible green. The process starts with 100 to 300 mW of power which must be tempered down to a 5mW beam. Excess energy is not emitted as light therefore, thanks to Thermodynamics, it emerges as heat. Heat is not a diode’s friend. When a diode gets hot, it shuts down.
The process for red lasers is much simpler as a red diode produces a red beam. There’s no conversion, therefore no excess heat. Red lasers are not in danger of overheating or frying the diode. This simplistic approach equates to less dollars in production and that translates as a cheaper price tag for consumers.
“Red lasers and the diodes that make red lasers are typically pretty dependable and pretty stable. That’s why you see them most of the time,” Matt Meyers, president of B.E. Meyers told Guns.com in an April interview. “Green lasers can be a little trickier depending on what power you have. Green lasers are more temperature sensitive and they’re more difficult to manipulate in certain circumstances overall. Sometimes that’s why you’ll see them cost a little more.”
A quick look at several laser manufacturers’ website revealed anywhere from a $50 difference to upwards of $100 between red and green models. Despite the higher price, consumers seem willing to throw down extra cash for the green beam.
“Green technology is more expensive than red to produce,” Michael Faw of Crimson Traceexplained to Guns.com in an email. “Customers spend more for green because it is sometimes easier to see during daylight.”
Better visibility, it seems, is worth the extra dough.
Not too long ago the addition of lasers on firearms was considered a gimmick, but today that thinking has changed. Shooters are learning the value of laser sights, which allow you to shoot more accurately in low-light conditions and from difficult positions where you simply can’t raise and aim using traditional iron sights. This widespread acceptance of laser sighting systems has led companies to offer various options for shooters, and none is more basic than the option of selecting a red or a green laser.
But that choice is not as simple as it may initially seem. To understand how lasers work, we must first understand some basic physics. Light travels in waves, part of the electromagnetic spectrum. Different wavelengths in the visible spectrum produce different colors; red light waves range from 620 to 750 nanometers, and green light ranges from 495 to 570 nanometers. The human eye is better able to recognize colors in the green spectrum, so a green laser is more visible under bright light conditions. It would seem logical, then, that all firearm lasers would be green because they are the easiest to recognize in the broadest range of ambient light conditions. But there’s a catch—building a red laser is relatively simple, requiring only a diode, optics and some basic electronics to construct. Green lasers are more complex. Building a green laser requires a special 808 diode, a second infrared laser crystal and a frequency-doubling crystal, and these parts must be carefully aligned to produce the green laser image. For this reason, green lasers are more complicated, slightly larger and more time-consuming (and thus expensive) to build. When you are purchasing a laser for your firearm there’s an inherent tradeoff. If you want a smaller, lighter, cheaper laser, red is best. If you want a laser that is more visible under a wide variety of lighting conditions, you’ll need a green laser.
“Side-by-side, a green and red laser will result in a green laser that is easier to see during bright conditions,” says LaserLyte’s Dusty Gibson. “During low light conditions both are extremely effective. Right now green is about double the price of red with similar features. There is cheaper green, but you will sacrifice brightness or battery life.”
Gibson says that new technology is allowing companies to make smaller, less expensive green lasers, but that many customers are happy with a red laser that is more affordable and more compact. The choice between the two, then, is largely a matter of personal preference and budget, and the decision is ultimately up to the consumer. If your firearm budget is limited but you still want the convenience and added benefit of a laser, then a red model should work just fine under a wide variety of lighting conditions. If you have the money and want a laser that is highly visible even in bright sunlight, then a green laser is probably a better option. No matter which laser you choose, there are many advantages to adding a laser sight to your firearm. It’s a misconception that all dangerous encounters happen in dark conditions, and most shooters primarily practice on well-lit ranges where ambient light is sufficient to use iron sights. In low-light, however, the advantage of a laser becomes quite obvious, and under those conditions both a red and green laser will provide an advantage. There are more red laser options available today than green, but demand for green lasers has prompted companies to offer more options in this color. No matter which option you choose, the addition of a laser to your personal defense firearm makes sense because it allows you to shoot accurately even under the worst conditions.
Red vs. Green Laser Sights
There are a ton of accessories and modifications available out there for your self-defense handgun. Some are useful, but let’s be honest — there’s a lot of stuff you can do to your gun that’s not really going to make any measurable difference. But if you’re looking for an upgrade that will actually add some utility to your pistol, I can’t think of many investments better than a laser sight. This is a topic I’ve covered before here on the Lounge. I’m a big fan of laser sights, particularly for their capability in low light situations.
Of the handgun laser sights on the market right now, Crimson Trace is the clear leader, primarily due to their products that feature “instinctive activation”. Their laser grips and laser guards place the activation switch on the grip of the handgun, so as long as you’re holding the gun, the laser is on. No extra switches or buttons to reach for — just present the pistol like normal, and the laser is on the target.
The downside is that these types of lasers only work with the guns they were designed for. Crimson Trace’s catalog covers a wide variety of handguns, including the many of the most popular models, but they don’t have a laser grip or laser guard for every gun out there. So as an alternative, Crimson Trace also offers an assortment of rail-mounted lasers and lights that will fit any handgun or rifle that has an accessory rail. They sent us a Railmaster Pro to review; a rail-mounted unit that includes a 100 lumen light and a green laser rather than the more typical red.
Looking at the new products coming from Crimson Trace and other laser sight manufacturers, it looks like green lasers are the future. They’re supposedly brighter and easier for the human eye to see compared to red lasers. The downside is the power requirement. Green lasers drain batteries quicker and at least for now, they’re also more expensive to manufacture.
So are they really worth the trade-off? I wanted to put the theory to the test. Just looking at the red and green lasers side by side on the wall in my house, the green laser did appear to be brighter. But would my eye actually pick up the green laser quicker on the target at the range?
Setting up the Test
Lighting conditions have a major effect on how visible a laser sight is. So I set up a short drill and ran it during three different times of day with iron sights, a red laser, and a green laser. The first run was in the middle of a cloudless day with bright direct sunlight on the targets. The second run was around dusk with only dim ambient sunlight. The last run was after dark, with no available light except the moon and the built-in flashlight on the Railmaster Pro.
The test gun was my full size Smith & Wesson M&P 9mm. Since I already have a set of red Crimson Trace laser grips for this gun, I was able to simply attach the Railmaster Pro to the accessory rail and easily switch between the red and green lasers. The iron sights are a set of “i-dot” style tritium night sights. The Railmaster Pro has four different modes; laser only, light only, laser and light, and laser with strobing light. So for the runs in the dark, I switched over to “light only” mode when shooting with the irons and the red laser.
Since acquiring a sight picture and sight tracking are both potential advantages of a laser sight, I wanted to make sure there were some target transitions involved in the test. I decided on a simple drill with a target setup very similar to the IDPA classifier. I set up three IDPA cardboard targets side by side at a distance of 10 yards from the shooting position with about 5 feet between each target. I varied the height of each target so that the top of the first target was at about six feet from the ground, the second was closer to four feet, and the third was a little over five feet.
Looking at both lasers projected on a target side by side, you can clearly see how their visibility changes along with the sunlight. I grabbed a quick photo under each of the three lighting conditions that I shot the drill. I also took one in the late afternoon as the sun was starting to fade, but I didn’t shoot the drill in this lighting. The photos were taken with the lasers about 10 feet from the target. That’s closer than I shot the drills, but my camera can’t see the laser as well as a human so the lasers had to be moved in for the pictures. In the low light photo, you can see some “speckling” in the green dot, which occurs when the laser’s lens gets dirty.
The Results
Starting from a low ready position, at the buzzer I fired six shots: two rounds to the chest area of each target, from left to right. In each lighting condition, I ran the drill with iron sights, then the red laser, then the green laser, and repeated the cycle twice. That gave me a score for 9 runs at each light level for a total of 27 runs. Following IDPA’s scoring rules, I added a half second to my time for every shot that landed in the “-1” area outside of the eight inch circle in the center. Here are the average adjusted times of the three runs for each sight under each lighting condition (in seconds):
Iron Sights
Red Laser
Green Laser
Sunny
4.81
5.16
4.47
Dusk
5.27
4.70
4.24
Dark
6.94
5.12
4.88
Even with the short exposure time of 1/60 of a second, the camera shows the path of the laser under recoil. This is actually a pretty close approximation of what the laser sight looks like to the human eye in low light. When the gun recoils, the laser appears not as a stationary dot, but a glowing streak.In all three lighting conditions, my average time was slightly quicker with the green laser than the red laser — by about two thirds of a second in the daylight, half a second at dusk, and a quarter second in the dark. Iron sights were actually faster for me than the red laser in direct sunlight, but slower at dusk, and significantly slower in the dark.
Observations
The numbers don’t lie, but they also don’t tell the whole story. In all three lighting conditions, the green laser was much more visible than the red — more so than the sub-one second time difference would suggest. Using the red laser in bright sunlight, I had to hesitate for a split second on each target to confirm that I could actually see the dot. Crimson Trace claims that the red laser will be visible at 15-25 feet in bright sunlight, so it’s no surprise that shooting from 30 feet, I found it easier to use the iron sights in this kind of light.
I didn’t struggle to see the green laser in daylight, but I have a bad habit of sometimes jerking the trigger the moment I see a good sight picture. So my confidence in being able to see the green dot actually led to a few more missed shots in the -1 zone. As the light faded, the green laser had less of an edge. I’m not a consistent enough shooter to declare that the .24 second difference in my average score with the red and green lasers at night time is a direct reflection of the lasers’ visibility. Both were very easy to see at night, and definitely beat the pants off using iron sights — even illuminated tritium night sights.
The Verdict
Regarding the brightness of red versus green lasers, the Crimson Trace website claims that “red lasers are most visible in low light conditions… The human eye naturally detects green with great ease, allowing it to appear brighter in conditions and environments with higher ambient or natural light.”
Overall, my experience validated these claims. Red is excellent in low light. Green is also highly visible in low light and pretty good in daylight, too. Based on this test, I plan to continue training primarily with my iron sights in daylight conditions and laser sights in low light conditions. I may begin to incorporate more laser sight training in daylight using one of the green lasers, but the priority will always be irons.
Despite the superior visibility of the green laser, if you’re practicing regularly with your handgun, a laser sight is less of an advantage during the day. They’re still great for firing from unconventional positions when you can’t properly align your sights, but in conditions where your iron sights are clearly visible, lasers aren’t quite the game changer they are in low light. That said, the added brightness of the green laser definitely expands its viability to a broader range of lighting conditions.
The Railmaster Pro
The Crimson Trace Railmaster Pro laser/light combo we used for the test is an interesting little unit. It’s smaller and more compact than most other comparable products, but that does come with some drawbacks. First, the light isn’t particularly bright by today’s standards. It was sufficient for getting accurate hits on the target at 10 yards and would probably get the job done for encounters inside a home. The brightness of the beam dropped off quickly at distances beyond 10 yards.
I would suggest supplementing any pistol mounted light with a handheld light anyway. Use the handheld light to ID the target (so you don’t end up pointing your gun at your dog or your family), and the pistol mounted light only for illuminating a known threat so you can fire with both hands on the gun.
I was also disappointed that the Railmaster Pro doesn’t have a momentary only activation switch. There are actually two activation switches, one on either side of the trigger guard, so it’s friendly for both right and left handed shooters. An inward press on either switch activates the unit. Press again to turn it off. I appreciate the simplicity, but I prefer the activation style of most other pistol mounted lights (and handheld lights) that I’ve used, which allow you to hold a switch to activate the light, and release to turn it off. One advantage the Railmaster Pro does have over much of the competition is the proximity of the laser to the bore line. Some other units feature a light with a large reflector that takes up the entire width of the rail. These lights throw bright beams, but the laser has to be situated either above or below the light, and most are below. With the laser so far from the bore line, it’s tough to zero the laser so that there’s not a significant off-set between the point of aim and point of impact. The Railmaster Pro has its laser at the top of the unit, closer to the bore. The small LED light sits just below the laser, and both are situated beside the battery compartment. This makes for a very compact package, and also means its easier to get a zero that’s closer to the point of impact at varying distances.
The Railmaster Pro will fit just about any handgun that has an accessory rail, and also attaches to picatinny rifle rails. If there aren’t any CT laser grips or laser guards available for your pistol, or you want to have a laser you can move between multiple guns, the Railmaster Pro makes a great “go-to” unit. I’ve even mounted this one to my M&P 22 compact. A suppressed .22 LR with a laser sight is the absolute perfect handgun to get a first time shooter hooked.
The green laser version of the Railmaster Pro requires one CR2 battery, which lasts for one full hour of constant activation. The red laser version will go two hours on the same battery. MSRP is $379 for the green version, $279 for the red. If you want to save a few bucks, you can get the non-Pro version of the Railmaster which is a laser only with no light. MSRP for those is $229 for the green and $159 for the red.
For the past two decades, more and more states have begun issuing concealed carry permits, and that legislation has generated a great deal of interest in firearms for personal defense.
handgunToday, most handgun manufacturers offer some type of compact firearm designed for concealed carry. Ammunition manufacturers are developing new and better defensive loads, and the market for comfortable, easy-to-conceal holsters has expanded greatly.
There’s also been an increase in the number of accessories designed specifically for concealed carry, particularly laser optics that are small enough and durable enough to serve daily duty on these compact handguns.
Handgun lasers are not a new creation, though. Crimson Trace has been offering firearm lasers for more than 25 years, and there are a number of other brands producing compact, lightweight, affordable handgun lasers designed specifically for personal defense.
But even as more shooters add laser products to their firearms, there are still a number of handgun owners that aren’t on board with the latest laser craze. Crimson Trace’s Kent Thomas likens this to the period before scopes were considered standard equipment on hunting rifles.
“Despite the fact that optics for rifles have existed since the early 1800s, it wasn’t until the late 1960s/early 1970s they became ‘adopted’ to make the user more accurate,” says Thomas. “Today, the consumer would never buy a hunting rifle (unless it is a brush gun) without putting a scope on it due to the clear advantages they offer. Scopes are now ‘standard equipment.’ We believe that no personal protection firearm is fully equipped without a laser sighting system. Laser are standard equipment for all personal protection firearms.”
If lasers are to become standard on defensive handguns it is important to understand the advantages that they offer. When they were initially introduced, lasers were viewed by many shooters as a gimmick, a novel addition to a gun that did little more than add weight — one more thing to worry about in the midst of a life-or-death struggle.
In truth, lasers are useful tools designed to enhance your ability to shoot accurately in various lighting conditions and in the most stressful situations. Whether you’re a fan of lasers or not, here are five reasons why a laser makes sense on your defensive handgun.
Lasers Aid in Low-Light Conditions
On a recent trip to Crimson Trace’s Oregon facility, I had an opportunity to shoot a series of targets in their indoor range. For the first part of the experiment, I fired at targets in full light using a Glock G21 with and without a laser optic, and my overall accuracy remained much the same whether I was using the laser or not.
But with the lights dimmed even slightly, the laser offered a huge advantage. Whereas I was struggling to align iron sights in those poor lighting conditions, the green laser offered instant target acquisition and my accuracy in the darkened tunnel was far better when the laser was activated. And, since dangerous encounters often occur in dim light, that’s a major advantage.
“Lasers are helpful sighting tools for many reasons, such as low light conditions,” LaserLyte’s Dusty Gibson said. “Equipping guns with lasers gives you the confidence in knowing exactly where your shots are going to impact.”
Additionally, lasers simplify the aiming process for those who have trouble viewing standard iron sights, another major advantage.
Lasers Allow You To Shoot From A Variety of Positions
The vast majority of shooters that regularly practice with their defensive firearm do so from a standard shooting position—standing up, balanced, with both hands on the firearm. Unfortunately, in a real-life shooting situation you may not have the luxury of shooting in this manner. It’s entirely possible that you will be injured or will have to shoot on your back, lying on your side, or from behind cover, and in the worst situations you may only be able to use one arm. Regardless of body position relative to the firearm, the laser offers you the ability to aim and fire accurately.
Gibson says that being able to shoot from these awkward positions is critical to surviving a lethal encounter, and lasers allow you to accomplish this. With a laser in place, you don’t need to align your eye to the sights to shoot accurately at moderate ranges, a huge advantage if you find yourself on the ground or in some other compromised position. In those circumstances, lasers allow you to stay in the fight.
Lasers Allow You To Remain Target-Focused
During a violent confrontation, it is important to remain focused on your target, and lasers allow you to do so. There is no need to align your sights, since your sight picture is on the same plane as your attacker. In a dangerous situation, you want to be able to devote all of your attention to the threat.
“All you need to do is look at the threat and align the laser dot,” Crimson Trace’s Mike Faw said. “There’s no looking at your hand for the gunsights, and then the front blade sight, and then back to the target or threat.”
“Lasers allow for greater situational awareness and both eyes open shooting so you can focus on delivering accurate shots and properly addressing the situation.”
Lasers Allow You To Remain Target-Focused
During a violent confrontation, it is important to remain focused on your target, and lasers allow you to do so. There is no need to align your sights, since your sight picture is on the same plane as your attacker. In a dangerous situation, you want to be able to devote all of your attention to the threat.
“All you need to do is look at the threat and align the laser dot,” Crimson Trace’s Mike Faw said. “There’s no looking at your hand for the gunsights, and then the front blade sight, and then back to the target or threat.”
“Lasers allow for greater situational awareness and both eyes open shooting so you can focus on delivering accurate shots and properly addressing the situation.”is drawn the laser activation pad is situated so that the finger automatically activates the optic. This eliminates the need to look down at the gun or adjust hand position to activate your laser. Some lasers even offer automatic activation when the gun is drawn from the holster, eliminating the need for an activation pad altogether.
Holster manufacturers have gotten on board with the demand for lasers, and now you can purchase holsters that are pre-fit to accept a laser optic.
And with some lasers, like the guide rod laser from LaserMax, nothing changes about the outside of the pistol, allowing you to use holsters that are fitted to the gun only.
Lasers Help Overcome Situational Stress
“Just as during any life threatening situation, the human body reacts in a vastly different manner than ‘normal’,” Thomas said. “As adrenaline screams through the brain and body, your vision narrows and there’s no such thing as ‘autopilot.’ Having a bright, aiming point on your target is the insurance policy your body needs when it’s no longer in control.”
One of the great advantages of having a laser mounted on your firearm is that it simplifies to shooting process. High-stress situations can limit the body’s ability to perform complex tasks, and that’s when the simplicity of a laser becomes a major advantage.
Learning to survive a deadly encounter is as much a mental challenge as it is physical. You need to be prepared to react in the event that you are attacked and perform. With proper training, it’s possible to manage stress, but lasers make firing under duress easier.
“In a life-threatening situation a lot of things can happen — and clear thinking is normally not-existent when adrenaline is flowing and the heart rate goes up,” says Faw. “Toss in darkness and difficulty seeing, and this is the condition when a laser sight shines and helps you succeed and live to see another day.”
Selecting the Right Sighting Option: Scopes, Lasers, Ghost Rings, Red Dot, Open Sights, etc.
There are a variety of options when it comes to choosing a sight for your handgun, shotgun, or rifle. Each sighting option has its own set of advantages and disadvantages. This article discusses each of the major options.
Scopes
Pros:Long range accuracy and target magnification.
Cons: Difficult if not impossible to use at very short ranges, can be the most expensive option, can be fragile.
Scopes are best suited for use with targets at medium/long ranges. At these ranges, a scope provides the shooter with the benefit of magnification, which makes it easier to hit the target, and to ensure that the target is indeed a target. Most high quality scopes will offer variable magnification, allowing the shooter to select the proper magnification for the distance and other conditions. Scopes are less useful at shorter ranges, and utterly unusable at very short ranges, due to the minimum focal length of the optics, and the extra time it can take to acquire a target when using a scope. For this reason, scopes are generally not useful for home/self defense guns, since self defense happens at close ranges and target acquisition speed is of the essence. Scopes are well suited to hunting and target shooting at longer ranges. Those who expect to use their firearm at both short and long ranges may benefit from mounting the scope high enough so that the built in open sights can still be used.
Lasers Pros: Very high speed target acquisition. Allows accurate firing from many positions and angles. Has an “intimidation factor” when used for self defense.
Cons: Can give away the shooter’s location. Dead batteries can be a liability.
Laser sights, such as the LaserMax and CrimsonTrace LaserGrip can be a great option, especially for self defense or varmint hunting. Laser sights allow for very rapid target acquisition, which is essential in these two scenarios. Laser sights also allow for decent medium range accuracy, although the very long range accuracy will suffer due to a lack of magnification (as a scope would provide). In the self defense scenario, lasers allow accurate firing from non standard positions and angles, such as when firing from bed at a home invader. On the down side, there is the need to turn on the laser sight, and the problem of getting of dead batteries right when the laser sight is needed (changing batteries regularly can greatly reduce this risk, of course). Laser sights make great home defense or tactical accessories for both handguns and long guns.
Ghost Rings
Pros: Fast and easy target acquisition.
Cons: No magnification, less accurate at longer ranges than rifle sights
Ghost ring sights consist of a vertical post near the front of the gun, and a hollow ring near the rear of the gun. The gun is aimed by centering the post within the ring, and placing the post on the target, which is something the human eye/brain seem to want to do automatically. This makes target acquisition fast, and almost second nature for most people. For these reasons, ghost ring sights are well suited for home/self defense. On the down side, ghost rings don’t give the shooter the same long range accuracy as could be had with a scope, or even with rifle sights.
Red Dot (Reflex Sight)
Pros: Fast and easy target acquisition. No projected light visible to the target.
Cons: Dead batteries can be a liability.
Red dot sights are basically non-magnifying scopes that have an illuminated red dot appear over the target. Unlike a laser sight, a red dot sight does not project any light onto the target, which can help prevent the shooter’s location from being revealed. The optics used by modern red dot sights are pretty amazing, but they can be purchased for reasonable prices. Since red dot sights are battery operated, they have the same liability as laser sights when it comes to dead batteries.
Open Sights
Pros: Inexpensive, works at a variety of ranges, reliable
Cons: Lack of the advantages such as magnification, accurate aiming from nonstandard positions, or faster target acquisition.
Open sights come standard on many firearms, and consist of a bead/post that is lined up with the target, as the shooter looks down the top of the firearm’s barrel. This type of sight, in various forms, is standard on most firearms, and has worked well for hundreds of years. It is inexpensive, and reliable, having few if any adjustable parts and not needing any batteries. On the down side, open sights do not provide magnification. Also, since the human eye cannot focus on the sights and the target at the same time, one will appear blurry to the shoote
When it comes to selecting the best laser sight for a home defense or concealed carry firearm, gun owners should carefully study the market, visit firearms stores or gun ranges for an in-the hand feel, and ask lots of questions.
Ask store staff and friends if they own a laser sight, or have shot a firearm with a laser sight installed. Some gun shops and ranges also rent handguns and other firearms with laser sights installed, or laser-and-light combos installed, so shoppers can experience laser sights in action. Many major big box stores and online firearms accessory sites also offer laser sights and product details.
The key to shopping success is educating yourself before you open your wallet.
After you know the details and differences, it’s time to see the real deal. Continue the education with a hands-on experience by feeling how the laser sight activates, and seeing how bright the laser shines on a distant target or wall. After this first step, zero in on models and features to find the perfect laser sight fit for the firearm that will be accessorized.
These six standard questions could help you determine a best fit or perfect sighting solution:
What firearm will be fitted with the laser sight or light? Crimson Trace’s website, as an example, lists many of America’s leading firearms manufacturers, and then goes into details by firearm model or laser sight type the shooter prefers. The company’s precision-engineered products fit firearms ranging from those offered by Beretta to Walther, plus the popular 1911s, and onto AR rifles. There are also laser and light products to fit any firearm with an accessory rail. Additional details about on-off switches to prolong battery life, adjustments, and other features can be found on the company’s website, too.
What products will best match the firearm’s intended uses? Buyers should determine whether they wish to install a green laser sight (tends to be more costly and have shorter battery life) or a laser sight with a red laser diode. And if a light will help, such as a person who is often alone late at night in dark parking garages, then is there a laser-and-light combo available? If you select these light-and-laser sight combos for a concealed carry handgun, remember that size (will the gun fit into a pocket or glovebox), the laser sight’s ease of operation/activation, and if there is a holster to hold the firearm with a laser sight installed, all become important questions that need answers.
One great source to learn about—and shop for—holsters is online at Crimson Trace’s Holster Resource Guide. More than 3,000 holsters from more than a dozen manufacturers are featured on this detailed pdf.
Should I buy a green or red laser sight? Both colors offer advantages. Red laser sights are normally more affordable and use less battery power. There are also more red laser sight models on the market than green ones, so the odds are higher that buyers will find a red laser sight product that fits.
Green laser sights are often more visible in bright lighting conditions, but these type laser sights tend to be more expensive.
Where can I buy, try, or see laser sight products? Gun shops and shooting ranges across America now stock laser sights and are available to answer questions. Look on countertops and in display cases for items such as blue guns (solid plastic and molded to look like a certain firearm but doesn’t function) for laser sights you can feel and operate.
More information and experiences are also available. Some gun shops and ranges now offer informative firearms classes for new buyers, and some of those classes permit the shooting of firearms with laser sights installed. Another option is to look at the firearms manufacturer’s website and see if models are available with laser sights pre-installed. There are many firearms available from a large number of manufacturers that have laser sights already installed.
What if I want a shotgun or AR for home defense? There are many options of laser sights that can be mounted on Weaver and Picatinny rails, and green and red options, too. Some products are available that are lights and lasers, or one of the newest models for most AR rifles has a replaceable grip that controls and changes light and laser sight modes on the module, all without wires to get caught on obstacles or become disconnected.
Many small but affordable rail-mounted laser sights are now on the market. Do the research and determine a good product fit for the firearm to be equipped. Remember, too, that for ease of operation, tabs and activation pads that naturally fall under a finger when the firearm is gripped normally are considered by most laser owners to be easier to use than buttons that must be frantically searched for in the dark. That ease of operation and activation becomes more important during times
Technology pertinent to gun owners — i.e., flashlights and lasers — has advanced as well. Remember the laser unit on Arnold Schwarzenegger’s 1911 in “The Terminator”? It was mounted on top of a seven-inch model because the unit itself was the size of two toilet-paper tubes (and I’ll let you in on a little secret — the battery pack was hidden on Arnold, connected to the gun by wires running down his arm). That movie came out in 1984, which means that in less than 30 years we’ve been able to make brighter, more powerful, longer-lasting lasers that are not one-tenth that size, but one one-hundredth! Flashlight technology has advanced apace, and modern handheld offerings are so bright that I’m surprised they don’t come with warnings that say “Accidental exposure may cause temporary blindness.” Let’s look at modern lasers first.
Targeting Dots These days you have your choice of red and green lasers from most manufacturers. If you’re not quite sure what the big difference is between red and green lasers (other than the color) and don’t feel like paying the extra money required for most green lasers, let me explain. It takes more power/technology to generate green laser light, which is why they cost more. So why choose green? Well, green lasers appear brighter to the naked eye. Red laser dots are great for indoor or low-light use, but they’re almost impossible to see on a bright, sunny day and tough to see outdoors even on a cloudy day. If you think you might have need for your laser in well-lit conditions, you’d be well served to buy something in a nice emerald green. Lasers are getting so small that manufacturers are finding ways to mount them just about anywhere on a gun you can think of — triggerguard, forward accessory rail, some even replace the recoil-spring guide rod. One new product that caught my attention is the Master Series of laser grips for 1911s from Crimson Trace. Most laser modules are ugly, but the Master Series grips combine attractive cocobolo-style wood with only the smallest bits of black plastic and rubber for the best of both worlds. To be honest, I am not a proponent of handgun lasers as sighting systems. Personally, I feel that if you’re trying to aim your gun using the little red or green laser dot, you’re not using your sights. This is a bad habit to get into. However, I do feel that handgun lasers have huge deterrent value. My feelings on that are directly echoed by an experience Blackhawk’s Chuck Buis had in a dark parking garage one day. Chuck spent a number of years as a plainclothes cop. He’s a large man with a loud voice, but that didn’t stop two men in that parking garage from approaching him and then splitting up to flank him. At the time, Chuck’s thought was, I’ve seen this movie before. Chuck, never one to play the victim, pulled out his pocket pistol and activated the laser attached to it. When both of the individuals, intent on misbehaving, saw the laser, they decided to pursue their activities elsewhere and Chuck never had to fire a shot. Crimson Trace’s slogan of “Helping Bad Guys Make More Informed Decisions” never seemed more appropriate. In this deterrent vein, this is also why Chuck advocates stainless and/or hard-chromed finishes for smaller pocket guns, just so bad guys can see they are guns as opposed to cell phones, car keys, etc. I can’t say I disagree. In fact, running the laser dot up the sidewalk to the threat, so he can see what’s coming, might be a very persuasive technique. There are exceptions to every rule (or opinion), and the exception to my “don’t use the laser to aim your gun” is the Center Mass laser from LaserLyte. Designed for use on a shotgun, this unit doesn’t project a single aiming dot but rather an entire circle pattern of bright-green dots. The pattern is designed to expand one inch for every yard — pretty much the rate most buckshot patterns expand from shotguns. You no longer have to guess how large a pattern your shotgun is going to make at whatever distance, something that is especially hard when events become, as they say, fluid. When it comes to improving the utility of the shotgun for home defense, I don’t think there’s been any product in the last 50 years that has done more than the Center Mass laser. Weaponlights, Flashlights and lumens When it comes to flashlights, I remember when their brightness was measured in “candlepower” rather than the modern lumens. What’s the difference? To put it very simply, candlepower is a measure of light emitted by one candle in a given direction. It is a measure of radiance taken at the source. The lumen is a measurement of light that illuminates a certain area. Lumens are based on the illumination of a one-square-foot area one foot away from the light source. Lumens are a lot easier to measure, which is why most manufacturers give their flashlight ratings in lumens. For those of you who remember the uniqueness and versatility of the original Mini Maglite (they’re still available), the original incandescent bulb provided a mere 15 lumens of light. Incandescent bulbs could only provide so much light, however, and burned out, so companies went to ever-brighter halogen and xenon bulbs. Modern LED technology has enabled flashlight manufacturers to make flashlights — a fraction the size of the Mini Maglite — which have triple-digit lumen output, for less money in adjusted dollars than what the Maglite originally cost. This size reduction is great because not only can shooters hold the equivalent of a spotlight in their hand, they can mount one on their handgun. Weaponlights are nothing new, but weaponlights so small that they can fit on guns carried concealed by private citizens are. For example, the Crimson Trace Lightguard is barely larger than some of the company’s lasers, yet it provides 100 lumens. The light is activated by Crimson Trace’s standard pressure switch. Considering that the majority of self-defense situations occur at night or in low light, having a flashlight mounted directly to your carry gun is a huge advantage. What’s the problem with a light on your carry pistol? Well, unless it’s an instinctive “squeeze the grip, and it turns on” design, you have to manipulate the light for it to work. If you’re wrestling with someone or restraining a loved one with your other hand, that might not work out so well. One solution is the TacLoc locking holsters with ECR (Enhanced Combat Readiness) from Viridian, designed for concealed carry. This rig has really changed the playing field. Mount your Viridian flashlight/laser/combo on your pistol, turn it on whatever setting you like, then holster your pistol. The light/laser will shut off. Draw your gun and the light/laser will automatically turn on, without you having to do anything. Everybody seems to be making “tactical” handheld flashlights now. My most recent acquisition is a 560-lumen unit sold by Walther. Once you get past the big names in the industry (SureFire, Streamlight, etc.), there are dozens of flashlight manufacturers out there. And most of them seem to be making good products.
My main complaint with most handheld flashlights is their controls. I want them simple. I don’t want to have to hit the button four times and make the sign of the cross to get it to turn on at full brightness. That is why my current favorite handheld flashlights are the ones put out by Terra Lux. Each Terra Lux flashlight has two rubber-covered buttons on the tail; a larger, longer tail switch; and a smaller, almost crescent-shaped Mode switch. The flashlight is turned on by the tail switch. It can just be held down for intermittent use, or it can be clicked on. If you want to get fancy with strobes or brightness settings, that’s when you move to the small switch. My f
how to choose a laser sight infrared laser sights ir lasers
1. Laser Weapon Sights
Laser Sights have grown in popularity in recent years because their ever-improving technology has led to smaller, lighter and more powerful lasers with more features for greater functionality. The increase in your accuracy and target acquisition speed will help you make a shot when it's most important. During an attack, even the most experienced shooter will have a decrease in their shooting effectiveness. While a laser sight is no substitute for practice and experience with firearms, it will help you stay on target even in the worst situations. That confidence will help you sleep a little easier at night, and the visual of a gun with a laser sight is a great deterrent against attackers.
So you've decided you want a laser sight. With all the options on the market today, it can be a struggle to find the exact model for your needs. You'll need to ask yourself a few questions as you begin your search:
What firearm are you using? Manufacturer? Model? Caliber? How long is the barrel? How are you going to mount your laser sight? What color laser do you need? Will you be shooting in the day or night?
Do you also plan to mount a weapon light? Will you be using Night Vision? Will you be using a holster?
It's important to have a clear answer to each of these questions before you buy a laser sight, or else you might pick an inadequate sight.
2: Laser Sight Mounting Systems and Types
The first thing you need to consider is the firearm you're using, and how you'll attach your laser sight. If you choose a laser sight that needs 2 inches of rail space and you only have 1 inch free, you'll be out of luck. Fortunately, there are a number of different mounting options available today.
A laser grip attaches to the grip of the gun, and are specially designed for each style of gun. You can find a number of great designs for most major handguns from Crimson Trace. From Glocks and 1911-style pistols to Walther PPs and Berettas, you'll likely find a laser grip for your handgun. Most of these laser sights have an activation switch on the back of the grip or the side near your thumb. When you draw your pistol from a holster the laser activates just from the pressure of your hand. This is incredibly convenient, and can save time when it's needed. A laser grip will affect your holster fit, as the retention straps may not fit. Fortunately, Galco has a wide selection of holsters that were specially designed to be used with Crimson Trace Laser Grips. You can find these great holsters right here at OpticsPlanet. If you have any questions about which model is right for your new laser, contact us and we'll help you find the perfect fit.
One other thing to note about laser grips is that they will change the size of your grip slightly, so you may need practice to get used to the new feel of your pistol.
Rear Sight Lasers attach instead of the rear sights on your handgun, and are generally very lightweight and easy to use. Unlike a laser grip, they rarely affect your holster and are easy to quickly attach to your gun with little-to-no additional parts or replacement of existing parts necessary. Rear Sight Lasers, because of their smaller size, tend to be less powerful, but there are some great options available from LaserLyte that can be mounted in no time and are great for adding accuracy without adding much weight or bulk to your pistol.
Trigger Guard Mounted Laser Sights have grown in popularity because of their versatility. While not all of these sights are universal, many can be used on a wide variety of firearms. The greater room available for these laser sights allows them to be a little larger, and the greater size provides a more powerful laser. There are two things to keep in mind with trigger guard lasers: they will change the shape of your gun, most likely necessitating a new holster, and because of the way they mount they rarely retain accuracy after even just a few shots.
If you want to use the same holster, an Internal Guide Rod Laser is a great choice. These lasers actually replace the internal guide rod, so they don't change the size of your handgun, but they do have their drawbacks. Installation, while not incredibly difficult, is more complex than some other laser sights, and you cannot adjust an Internal Guide Rod Laser. The design almost always provides for accuracy to two inches at twenty yards, but if you settle for no less than perfect accuracy keep in mind that you cannot adjust these sights for windage or elevation. The most common laser sights mount to a rail. You can find great laser sights that mount on Weaveror Picatinny bases. You need to make sure you have enough rail space for the sight, though there are options available today such as the LaserMax Unimax Micro Rail Mounted Laser that are designed to fit on Sub-Compact pistols. This sight is tiny, yet adjustable for windage and elevation, and powerful enough for most situations. Rail mounted lasers are the go-to choice for most rifles because they tend to be more powerful and have more features than smaller lasers.
Rifle and Shotgun lasers can be a bit larger and heavier to allow for more power and longer batterylife, as well as to incorporate other accessories such as weapon lights. A great way to save money, rail space and weight is to use a laser/light combo such as the Insight Technology WL1-AA Weapon Light w/ Laser. It's a bit heavier than most lasers, but the included flashlight gives you multiple options for enhancing the effectiveness of your rifle. There are also a few laser/light combos for handguns that are small enough to fit most compact handguns. The Streamlight TLR-2is a great option for its amazing power and versatility. Remember that the TLR-2 will affect the profile of your gun, so you may need a new holster.
3. Red or Green Laser Sight?
Once you know how you'll mount your laser sight, you need to decide what color laser you want to use. Green lasers and red lasers each have their strengths and weaknesses, so consider when and where you'll be shooting, as well as the firearm you're using.
Dual Beam Aiming Laser w/ Red & green Laser Sight Red Laser The traditional choice, red lasers are very durable and cheaper to produce. Since they need to stand up to the recoil from your firearm, the strength of a red laser is often ideal. Red lasers also have a wider operational temperature range than green lasers, so if you're in particularly cold or warm conditions a red laser will work when a green laser will not. While this range varies from laser to laser, a red laser is generally operational between 15 and 120 degrees, while a green laser is operational between 40 and 100 degrees. So if you're a police officer in a Northern State in the winter, you'll want to go with a red laser.
Also note that the simpler technology of a red laser consumes less power than green, so you'll get longer battery life.
Pros: Less expensive, stands up better to recoil, better operational temperature range. Cons: Less visible in the day time, only visible up to 25-30 yards.
Green Laser The number one reason to use a green laser is daytime visibility. You will have a much easier time seeing a green laser in broad daylight than red. Green is close to the center of the visible light spectrum at about 532 Nanometers. Red is higher on the spectrum at 635 Nanometers. Because of this, a red light will be obscured by other light, whereas a green will not. While a red laser may only be visible up to 25 or 30 yards during the day, a green laser can be visible at 100 yards or more. This is huge for target shooters, as target shooting is generally done during the day, and red lasers are often ineffective. Green lasers are also extremely useful for laser bore sights, as you generally sight in your new scopes in the day and are trying to see a dot on a white piece of paper at 50 yards. Red lasers may not show up. (for more on laser bore sights see our how-to article on boresighting!)
The drawbacks of a green laser are price and durability. A green laser of comparable quality to a red laser will usually cost about double. This is because of the more advanced technology required to make them, and how challenging it is to make a green laser that can withstand the shock from recoil. The tech in a green laser is far more delicate than a red laser, so they are not quite as tough. You can certainly find a tough and reliable green laser, but you'll pay more for it.
Pros: Effective visible range up to 100 yards and more, great for day time shooting. Cons: More narrow operational temperature window, more delicate than a red laser, more expensive.
4. Laser Sight Modes Explained
Some laser sights come with more than one mode. The differences between these will affect your speed of target acquisition.
A laser that pulsates, strobes or flickers is easier for your eye to see. This is because flickering light is unnatural. Think of emergency flashlights. There is generally a blinking or strobe function because rescue workers are more likely to see you if you have a blinking light because the eye will be drawn to the unnatural image. With a laser sight this will not only allow you to find the laser dot quicker, but also see the laser at greater distances on varied backgrounds such as foliage. Pulsating lasers also save a lot of battery life, as those each brief moments when the laser is off is another moment that the battery will last.
A constant on laser will give you a steady dot on target. This is fine for many situations, especially in close quarters such as home defense, but for greater distance you'll want a pulsating laser.
Some laser sights will come with a quick and easy switch so that you can change from pulsating to constant based on your preference. The Viridian C5 Sub-Compact Laser is a green laser with both a pulsating and a constant mode. If you combine the pulsating mode with a green laser you will be able to see the dot at an incredible distance, which is why these are so popular.
5. Infrared Laser Sights - IR Lasers
Another option you may come across when selecting a laser sight is IR Lasers. An Infrared Laser is intended for use with night vision devices. Night vision intensifies light to provide an image, and while they can give you a great view in low light situations, they do require at least some ambient light to work. Starlight or moonlight is generally sufficient to give you a great view, but indoors or in areas of absolute darkness you will need to supplement the ambient light to see through night vision. Flashlights are a great way to get a better look in the dark, but they give away your position. Infrared light is invisible to the naked eye, but will give your night vision goggles plenty of light to see in the darkest situations.
IR Lasers allow you to see without being seen, but they are restricted for use by law enforcement and military professionals because having an IR laser flashed in your eye can do permanent damage, possibly even partially blinding you. While they are not ideal for home defense, in combat situations they are an outstanding way to gain a tactical edge over an enemy.
These days, you can't swing a dead opossum without hitting visible-laser options for most handguns and tactical rifles. Once relegated to a high-dollar clientele only, they're now standard and affordable accessories. Although I don't currently use lasers, I employed them heavily while playing the Special Operations game. I usually used infrared (IR) lasers that required night vision equipment, since visible lasers let bad guys know where you are. Occasionally, I trained with visible lasers on handguns, but my use of IR lasers was specific to shoulder-fired weapons. In those days, visible lasers weren't strong enough to reach rifle ranges, but that's no longer the case.
As civilians, we're unable to legally own IR lasers, so visible is the only option. Some green-laser manufacturers claim to be able to project an aiming point to 1,000+ yards at night, raising them to a new level of utility. Here are a few things I learned about mounting and zeroing IR devices that can be applied to this longer-range class of visible lasers as well.
MountingA laser's position on the rifle will affect several functional aspects, including manipulation of controls. Most tactical rifles have factory or add-on rails present, and all modern rifle lasers I've seen have rail mounts. If your laser has no remote capability, it should be positioned close enough to the support hand to allow easy manipulation of the controls without a dramatic shift in hand placement. Ideally, you'll want to be able to momentarily activate the laser on demand, without "burning" it constantly. This will both save battery life and reduce your signature. If you plan to leave the laser in place long-term, a mild thread-locker that creates fastener-friction will help the device remain in place during hard use. Be sure not to use any thread-locker that requires heat for removal. Polymer laser housings and sensitive electronics won't fare well under even short-term torch heat.
ZeroingBe conscious of where the laser's line (LL) is in relation to the line of bore (LOB) when choosing a mounting location. Just like a riflescope's line of sight, the LL and the LOB require a merging of sorts in order to place rounds on target. The closer they are on the rifle, the easier it is to zero the laser. Problems arise from the fact that the LL is usually offset from the LOB in a compound direction (i.e. up/down and left/right). Two popular zero methods are used to deal with this problem: Point of Aim/Point of Impact (POA/POI) and Offset. The POA/POI method is similar to that used for sight zeroing, in that you select the range where you want the LL to intersect with the bullet's POI and adjust windage and elevation accordingly. The problem with this method is the actual zero distance is the only place where they intersect. The further the projectile is from that zero distance (in either direction), the greater the deviation. Think of the LL and LOB forming a big "X" with the zero range being in the center. Realistic engagement distances are relatively limited with a laser, so this isn't a problem for most routine shooting. However, you still need to know how far off the projectile will be from the laser at different distances. I used this method in the Army, and it worked fine for shots out to 200 meters with 5.56 NATO and approximately 300 meters with .308 Win. Beyond those distances, I used different aiming devices for night shooting.
The offset (or parallel zero) method is commonly taught and used, but is often misunderstood. This technique requires you to measure the deviation from the LL to the LOB in direction and distance. The idea is to zero the laser at a specified range—usually 100 meters—so the LL (indicated by the laser's spot on target) is the same direction and distance (in inches) from the bullet's POI as the LL and LOB are on the gun. The theory usually given for this method is LL/POI deviation remains constant far enough out, the shooter need only hold slightly off of the intended POI and fire, regardless of distance. Unfortunately, we don't shoot in a vacuum, so gravity and atmospheric effects influence bullet flight paths to be anything but parallel to the LL. In other words, the bullet is going to drop farther and possibly be pushed by the wind from its zeroed POI as it continues downrange. So, the relationship between the LL and LOB zeroed-in at 100 meters is going to change with increased distance. If bullets flew the way lasers are projected, life would be much simpler for shooters.
A good partial remedy to both of the above methods' flaws is to mount the laser so that the LL is directly above or below the LOB. The result is that normal trajectory (without wind effects) will plot the POI directly above and below the visible laser's "spot" out to several hundred meters (before spin drift becomes a factor). It's much easier to account solely for elevation holds than for an elevation and windage divergence that changes with distance. Most military laser designs don't allow this due to their width, which makes me wonder why someone hasn't developed an offset mount to solve this problem.
One last trick is to use your zeroed iron or optical sights to quickly get your laser on target when zeroing. After both are zeroed, you can check one against the other to ensure nothing has changed from time to time. I recently tested a $200 green rifle laser that would not hold zero from one shot to the next. Don't trust literature, sales pitches or gun writers with your life. Test your laser's mounting and zero methods at multiple ranges in day and night conditions thoroughly before relying on it for real world needs.
Usually when a laser didn't hold zero it was 1 of 3 issues.
1) Mount wasn't tightened correctly 2) Diode set screw not tightened (not all lasers have a third screw, Windage, Elevation and SET Screw) 3) Stripped W, E or Set screw.